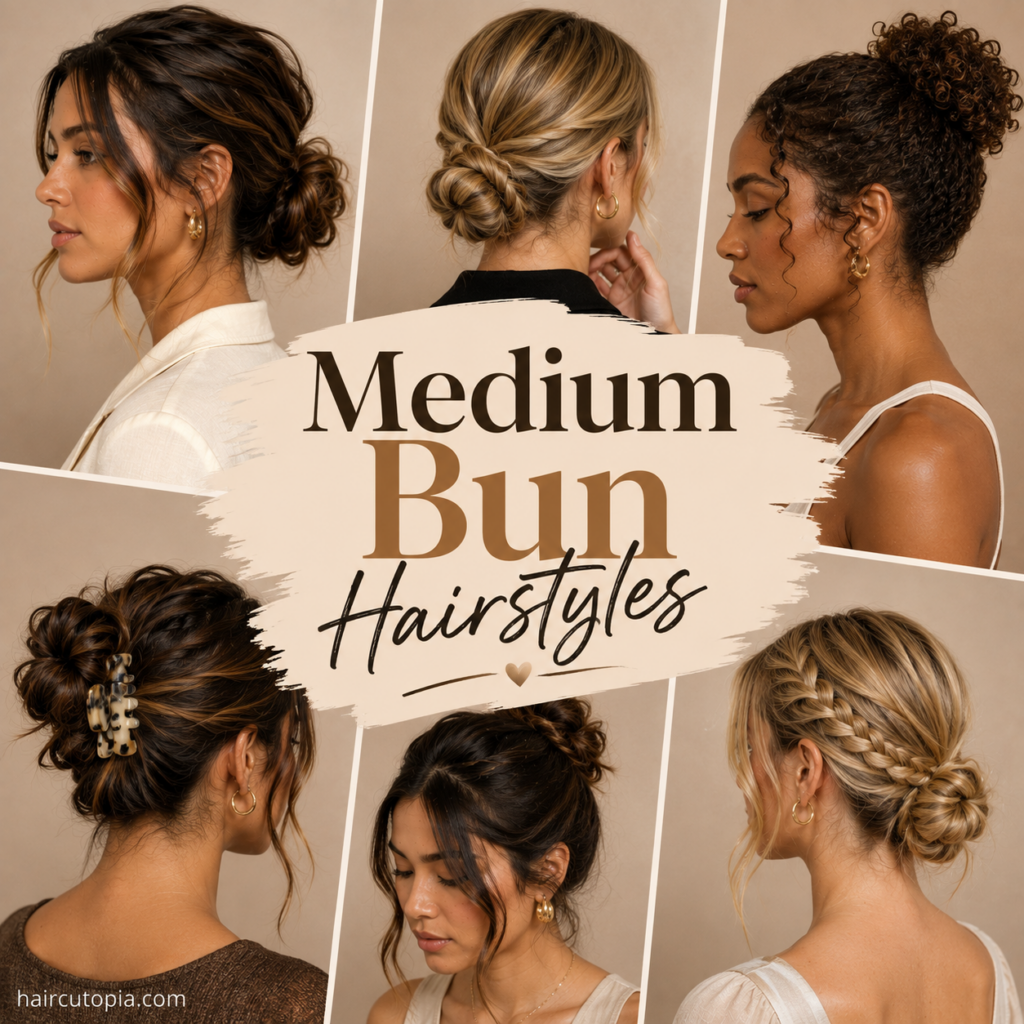
Medium-length hair sits in a pretty convenient place when it comes to buns. There’s usually enough length to twist, wrap, braid, or pin, but not so much hair that every updo feels heavy.
That opens up a lot of options.
You can keep things simple with a low bun for everyday wear, add texture for a softer messy style, or go polished with a sleek bun for work or a special occasion. Medium hair also works especially well for half-up buns, braided details, twists, and accessories.
The trick is finding a style that works with your particular cut and texture. Shoulder-length hair with lots of layers behaves differently from a one-length cut that falls several inches below the shoulders.
Here are 25 medium bun hairstyles to try, along with practical tips for making them work with straight, wavy, curly, coily, fine, and thick hair.
What Hair Length Works Best for a Medium Bun?
For this guide, medium hair generally means hair that falls somewhere around the shoulders to several inches below them.
At this length, most people have enough hair to create a full bun, although layers can affect how easily everything reaches the elastic.
Low and mid-height buns tend to be the easiest because shorter sections don’t have to travel as far.
Depending on your cut, you can experiment with:
- Low buns
- Messy buns
- Sleek buns
- High buns
- Half-up buns
- Braided buns
- Twisted buns
- Curly and textured buns
- Claw-clip styles
You may still need a few bobby pins around the nape or sides, especially if your hair is heavily layered.
1. Classic Low Bun
Start with the bun that works almost everywhere.
Gather your hair into a low ponytail at the nape. Twist the length around itself, wrap it around the base, and secure it with pins.
You can brush the front smooth for a cleaner look or gather the hair with your fingers for a softer finish.
Because the bun sits low, this style is particularly forgiving when medium hair has shorter layers.
2. Messy Medium Bun
A messy bun doesn’t need waist-length hair to look full.
Gather your hair into a mid-height or low ponytail and begin twisting it around the base. Instead of wrapping everything tightly, keep the shape loose.
Secure sections with bobby pins, then gently pull at the bun to create more width.
A few pieces around the face or nape can stay loose.
The goal is controlled imperfection rather than a perfectly round bun.
3. Sleek Low Bun
When you want something polished, smooth everything down.
Create a center or side part and brush your hair toward the nape. Apply a small amount of styling cream or gel where needed, then secure the hair into a ponytail.
Twist the length into a compact bun and pin the ends underneath.
Medium hair is particularly well suited to this style because the bun can stay relatively compact without becoming too bulky.
4. Center-Part Bun
A defined center part can completely change the appearance of a basic bun.
Part your hair evenly, smooth both sides backward, and create a low or mid-height bun.
Tucking the hair behind the ears creates an even cleaner silhouette.
Keep the bun sleek for a minimalist finish or leave some natural texture through the length before wrapping it.
5. Side-Part Low Bun
If a center part feels too severe, move it to the side.
A subtle side part gives the front of the hairstyle a softer shape while maintaining the polished feel of a low bun.
Gather the hair at the nape and twist it into place.
You can also leave a small section around the front loose and style it with a gentle wave.
6. Loose Low Bun
Not every bun needs to be tightly secured against the scalp.
Gather your hair loosely at the nape and create a soft, slightly undone bun. Use pins to hold the shape rather than tightening the elastic repeatedly.
Gently loosen the crown afterward.
This style works especially well with naturally wavy hair because a little irregular texture adds to the relaxed effect.
7. Medium Curly Bun
Curls give a medium bun plenty of natural volume.
Instead of twisting all the hair into one tight rope, gather it into a ponytail and arrange individual curly sections around the base.
Pin them where they naturally fall.
This keeps more of the curl pattern visible and creates a fuller-looking bun.
Leave a couple of curls around the face if you want a softer finish.
8. Wavy Textured Bun
Loose waves can make a simple bun look much more detailed.
Start with naturally wavy hair or add a few bends through the length. Gather everything into a low or mid-height ponytail and pin sections around the base.
Don’t brush the waves completely smooth before styling.
The texture helps create dimension and makes the finished bun appear fuller.
9. Mid-Height Bun
If low buns are your default, moving the placement up a few inches can make the hairstyle feel completely different.
Gather the hair around the middle of the back of your head.
Twist it into a bun and secure it with pins.
A mid-height placement is high enough to feel lifted but usually low enough that shorter pieces around the nape can still reach.
10. High Bun for Medium Hair
Medium hair can absolutely work in a high bun, although layers may need a little extra help.
Gather the hair near the crown and secure it in a ponytail. Twist the length around the base and pin it into place.
Use bobby pins for shorter sections around the nape.
For a casual look, don’t worry if a few pieces escape. For something sleeker, smooth and pin those sections individually.
11. Half-Up Bun
A half-up bun is one of the easiest styles for medium hair.
Gather the upper section from around your temples and crown. Secure it in a small ponytail, then twist the length into a bun.
Leave the remaining hair loose.
Straight hair creates a clean, simple look, while waves and curls add more volume and movement.
It’s also an easy option when you want your hair away from your face without wearing all of it up.
12. Half-Up Messy Bun
Take the basic half-up style and make it a little less structured.
Gather the top section with your fingers instead of brushing it perfectly smooth.
Twist the hair loosely around the base and secure it with an elastic or pins.
Gently pull at the bun to make it fuller.
This style works particularly well with layers because loose pieces blend naturally into the overall look.
13. Twisted Low Bun
Twists add detail without requiring advanced styling skills.
Leave out a section on each side of your head and create a low bun with the remaining hair.
Twist each side section toward the back, then wrap or pin the ends around the bun.
You get a more intricate-looking hairstyle while also keeping shorter side pieces under control.
14. Braided Bun
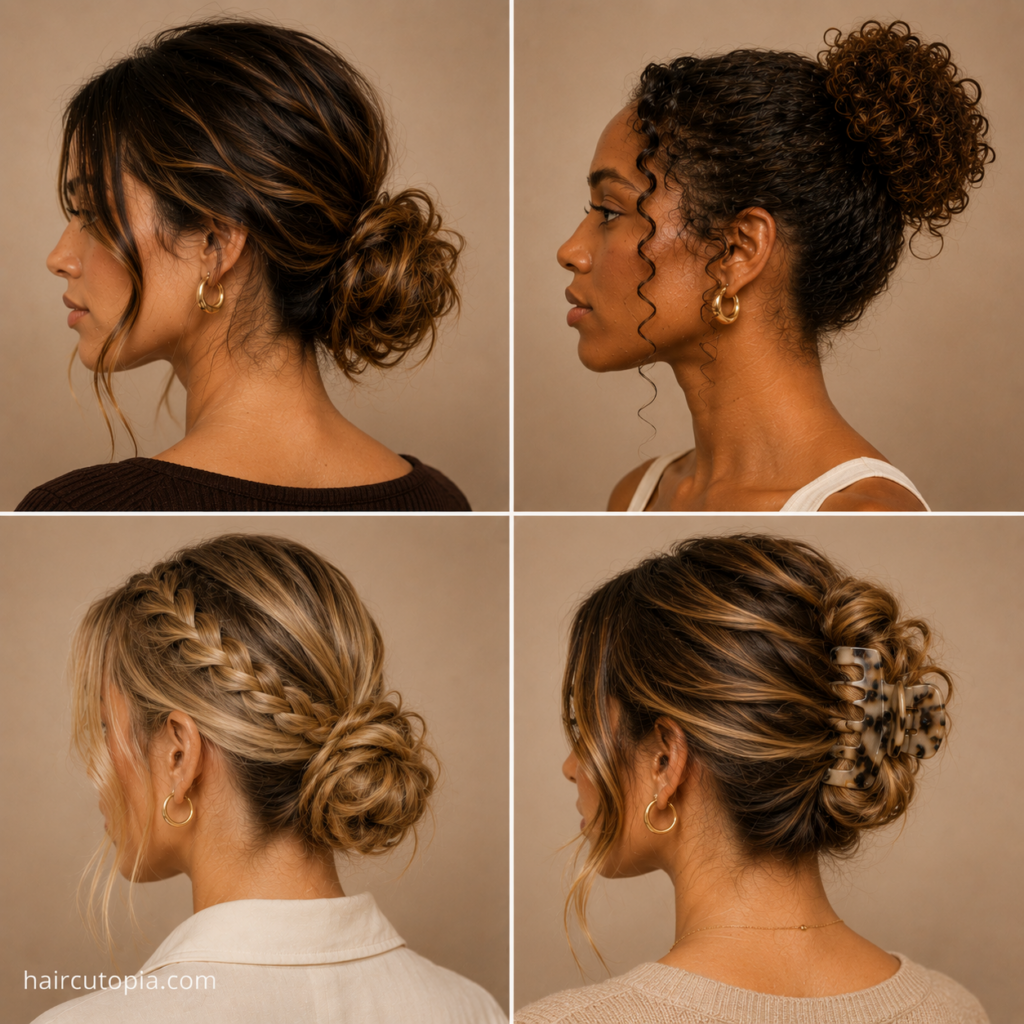
A simple braid can completely change the texture of a bun.
Create a low or mid-height ponytail, braid the length using a basic three-strand braid, and secure the end.
Then wrap the braid around the ponytail base and pin it into place.
For a fuller bun, gently loosen the braid before wrapping it.
Medium hair usually gives you enough length to create the shape without leaving an excessive amount of hair to manage.
15. Bun With Side Braids
Instead of braiding the bun itself, add smaller braids around the sides.
Leave out one section near each temple and create your bun first.
Braid the loose sections toward the back, then pin them around or underneath the bun.
You can keep the braids neat and tight or loosen them slightly for a softer effect.
16. Claw-Clip Bun
A claw clip can turn medium hair into an updo in seconds.
Gather the hair at the back and twist it upward. Fold the remaining length back toward the base and secure everything with a claw clip.
Tuck the ends in for a cleaner look or leave them visible for something more casual.
Medium hair is ideal for this style because there’s usually enough length to twist without creating an oversized bundle under the clip.
17. Bun With Face-Framing Pieces
A couple of carefully selected front sections can soften almost any bun.
Before gathering your hair, leave out a small piece near each temple.
Create your bun, then style those sections naturally or give them a slight bend.
This works with low, middle, high, messy, and sleek buns.
If you already have face-framing layers, you may not need to pull anything out at all.
18. Bun With Curtain Bangs
Curtain bangs pair naturally with buns because they create shape around the face while the rest of the hair is pulled back.
Style the bangs away from the face and create your bun at your preferred height.
A low bun gives the hairstyle a softer, more understated feel.
A higher bun creates more contrast and puts greater emphasis on the bangs.
19. Romantic Loose Bun
For a softer special-occasion style, start with waves or curls.
Gather the hair loosely at the back without flattening the crown. Instead of creating one tight twist, pin sections individually into a bun shape.
Leave a few delicate pieces around the face.
The finished bun should feel airy and textured rather than perfectly structured.
20. Polished Work Bun
A medium bun makes a practical work hairstyle because it keeps the hair contained without requiring a complicated updo.
Create a center or side part and gather your hair into a low or mid-height ponytail.
Twist it into a neat bun and pin the ends securely.
Smooth obvious flyaways while allowing some natural texture if you prefer.
The style should be comfortable enough that you don’t need to keep adjusting it throughout the day.
21. Special-Occasion Bun
Medium hair gives you enough length to create a dressed-up bun without needing an elaborate technique.
Start with loose waves or curls to add texture.
Create a low bun and pin sections around the base rather than twisting everything tightly.
Add subtle crown volume and leave a couple of face-framing pieces.
A decorative pin, cuff, or small accessory can provide the finishing detail.
22. Bun With a Scrunchie
A scrunchie makes an everyday bun even easier.
Create a low, middle, or high bun and secure the fabric around the base.
Larger scrunchies add visual volume, while smaller ones create a more understated look.
For medium hair, a scrunchie can also help hold shorter layers that might otherwise slip out of a traditional elastic.
23. Ribbon Bun
A ribbon adds detail without changing the actual bun technique.
Create your bun first and secure it properly with an elastic and pins.
Then tie a ribbon around the base.
A small bow works well for a subtle finish, while longer ribbon tails create a softer, more noticeable look.
This pairs especially well with low and loosely textured buns.
24. Double Buns
Why stop at one?
Part your hair down the middle and divide it into two sections. Create a ponytail on each side, then twist each one into a small bun.
Wear them low near the nape for a more understated style or higher for something playful.
Medium hair is a good length for double buns because dividing the hair naturally reduces the size and weight of each bun.
25. Effortless Everyday Bun
This is the style for mornings when you’re not interested in turning hairstyling into a project.
Gather your hair wherever it naturally feels comfortable—low, middle, or high.
Twist it loosely, wrap it around the base, and secure it.
Pin anything that genuinely needs pinning and leave the rest alone.
A little looseness around the crown or a few shorter pieces at the nape can make the style look intentional rather than unfinished.
Best Bun Hairstyles for Shoulder-Length Hair
Shoulder-length hair sits right at the point where buns become much easier.
The simplest options are usually:
- Low buns
- Half-up buns
- Messy buns
- Twisted low buns
- Claw-clip buns
- Small braided buns
- Textured buns
High buns can work too, but shorter layers near the nape may require bobby pins.
If your hair is heavily layered, styles that use multiple twists or pinned sections can be easier than trying to get every piece into one elastic.
Medium Bun Hairstyles for Different Hair Textures
Your natural texture can do a lot of the styling work for you.
Straight Hair
Straight hair works especially well with sleek buns, center parts, ballerina-inspired styles, and clean low buns.
If your hair is very slippery, a lightweight texturizing product can make it easier for pins to hold.
Wavy Hair
Waves naturally give buns more dimension.
Loose, messy, romantic, and textured buns are particularly easy because you don’t have to create perfect smoothness.
Use your fingers when gathering the hair if you want to preserve the wave pattern.
Curly Hair
Curly medium hair can create a beautifully full bun.
Instead of twisting curls tightly, arrange and pin them around the base.
This allows the natural shape and volume to remain visible.
Coily Hair
Coily hair can create full buns and puff-inspired updos with plenty of texture.
You can smooth the perimeter for contrast or keep natural texture visible throughout the entire hairstyle.
Choose a placement that doesn’t require excessive tension.
Fine Hair
Fine hair can sometimes produce a smaller bun, but texture helps.
Add waves, gently loosen the bun after securing it, or pin sections individually to create more width.
A scrunchie or subtle accessory can also add visual volume.
Thick Hair
Thick medium hair usually creates a substantial bun without much effort.
The challenge is keeping it secure and comfortable.
Use enough pins to distribute the weight rather than relying on one very tight elastic.
Low and mid-height placements may also feel more comfortable than a high bun.
How to Make a Medium Hair Bun Look Fuller
You don’t necessarily need more hair. You need to use the hair you have strategically.
Add Texture Before Styling
Waves and curls take up more visual space than hair that’s completely straight.
Even a few loose bends can make the bun look fuller.
Don’t Twist Too Tightly
The tighter you twist the ponytail, the smaller the resulting bun becomes.
Keep the twist slightly loose and spread the hair outward before pinning.
Pin Sections Individually
Divide the ponytail into two, three, or four sections and arrange each one around the base.
This gives you more control over the width and shape.
Loosen the Bun Carefully
Once everything is secure, gently pull outward on small sections.
Make tiny adjustments rather than tugging on the entire bun.
Balance It With Crown Volume
A little lift at the crown can make the proportions of the hairstyle feel fuller overall.
You don’t need dramatic teasing. Subtle volume is often enough.
How to Keep Medium Hair in a Bun All Day
A bun that looks great for 20 minutes isn’t especially useful.
Start with an elastic that’s strong enough for your hair thickness without being painfully tight.
Then:
- Secure the ponytail at the height you want.
- Create the bun without repeatedly tightening the base.
- Add bobby pins around several points of the bun.
- Pin shorter layers separately if needed.
- Use light styling product on areas that tend to slip.
- Check that the bun feels comfortable before you’re done.
If your hair is very smooth, adding a little texture beforehand can give pins more grip.
How to Style a Bun With Medium Layered Hair
Layers can make buns look great, but they also create more pieces that want to escape.
Instead of fighting them, choose a style that accommodates them.
Low buns require less reach, while messy and textured styles allow some shorter pieces to remain visible.
Side twists are another useful trick. Rather than pulling shorter sections directly toward the elastic, twist them backward and pin them into the bun.
You can also leave front layers out intentionally.
That usually looks better than using excessive product just to force every strand backward.
How to Make a Medium Bun Look Polished
A polished bun doesn’t have to be completely slick.
Focus on the overall shape.
Start With an Intentional Part
Choose a center part, side part, or no visible part rather than letting the hair separate randomly.
Keep the Bun Balanced
Check the hairstyle from the sides and back.
If one section is sticking out significantly farther than the others, reposition it with a pin.
Style Loose Pieces
Face-framing sections can look beautiful, but give them a little attention so they appear intentional.
Control Flyaways Selectively
You don’t need to eliminate every small hair.
Focus on anything that distracts from the shape of the hairstyle.
Choose Accessories Carefully
A ribbon, scrunchie, decorative pin, or clip can elevate the style.
One well-chosen accessory is usually enough.
Medium Bun Hairstyles for Work
For work, comfort and staying power are usually more important than creating an elaborate hairstyle.
A sleek low bun is a dependable choice, but it isn’t your only option.
You might also try:
- Center-part low buns
- Mid-height buns
- Soft twisted buns
- Natural curly buns
- Claw-clip buns in more casual workplaces
- Neat braided buns
Choose a style that suits your workplace and doesn’t require constant adjustment.
Medium Bun Hairstyles for Special Occasions
Medium hair can create plenty of event-ready updos.
Waves and curls are useful because they add texture and make the bun appear more intricate.
For weddings, parties, dinners, graduations, and other celebrations, try a romantic low bun, twisted style, braided bun, or softly textured updo.
Finish with a small accessory if it complements the rest of your look.
You don’t need to turn the bun into something enormous. A compact, beautifully arranged style can look just as elegant.
What You Need for Medium Bun Hairstyles
A basic styling kit is usually enough:
- Hair elastics
- Bobby pins
- Small clear elastics
- Brush or comb
- Light styling cream or gel
- Optional texturizing product
- Claw clip
You can add scrunchies, ribbons, decorative pins, or other accessories when you want more variety.
Frequently Asked Questions About Medium Bun Hairstyles
Can medium-length hair go into a bun?
Yes. Shoulder-length and medium hair can usually create low, mid-height, messy, braided, twisted, and half-up buns. High buns may require extra pins if you have shorter layers near the nape.
What is the easiest bun for medium hair?
A classic low bun is one of the easiest because most of the hair can reach the nape without much tension. Half-up and claw-clip buns are also quick options.
How do you make a bun with shoulder-length hair?
Gather your hair into a low ponytail, twist the length around the base, and secure it with pins. If some layers don’t reach, pin them separately rather than pulling the hairstyle tighter.
How can I make my medium bun look bigger?
Add waves or texture before styling, avoid twisting the hair too tightly, and gently expand the bun after securing it. Pinning smaller sections around the base can also create more width.
What bun is best for medium layered hair?
Messy low buns, textured buns, twisted styles, and half-up buns are especially forgiving. They allow shorter layers to blend into the hairstyle instead of requiring every piece to reach the same point.
Can medium curly hair go into a bun?
Yes. Curls can give a medium bun plenty of natural volume. Pinning individual curls around the base rather than tightly twisting them can help preserve their shape.
Can you make a high bun with medium hair?
Usually, although it depends on your exact length and layers. Hair around the nape may need bobby pins if it can’t comfortably reach the crown.
How do I make a medium bun look elegant?
Start with a defined shape, control obvious flyaways, and arrange the bun rather than simply wrapping it tightly. Soft waves, a clean part, subtle crown volume, or a small accessory can make the style feel more polished.
Final Thoughts
Medium bun hairstyles give you a lot of room to experiment without requiring extremely long hair.
You can keep things simple with a low everyday bun, embrace your natural texture with a curly or wavy style, or add braids and twists when you want something more detailed. For work, a clean low or mid-height bun keeps things practical. For special occasions, a little texture and strategic pinning can create a surprisingly polished updo.
And if your layers don’t all cooperate, that’s normal.
Pin the pieces that need help, leave a few out intentionally, and choose a bun placement that works with your haircut rather than against it.
Once you’ve found two or three versions that suit your hair, a bun becomes one of those hairstyles you can rely on without thinking too hard about it.