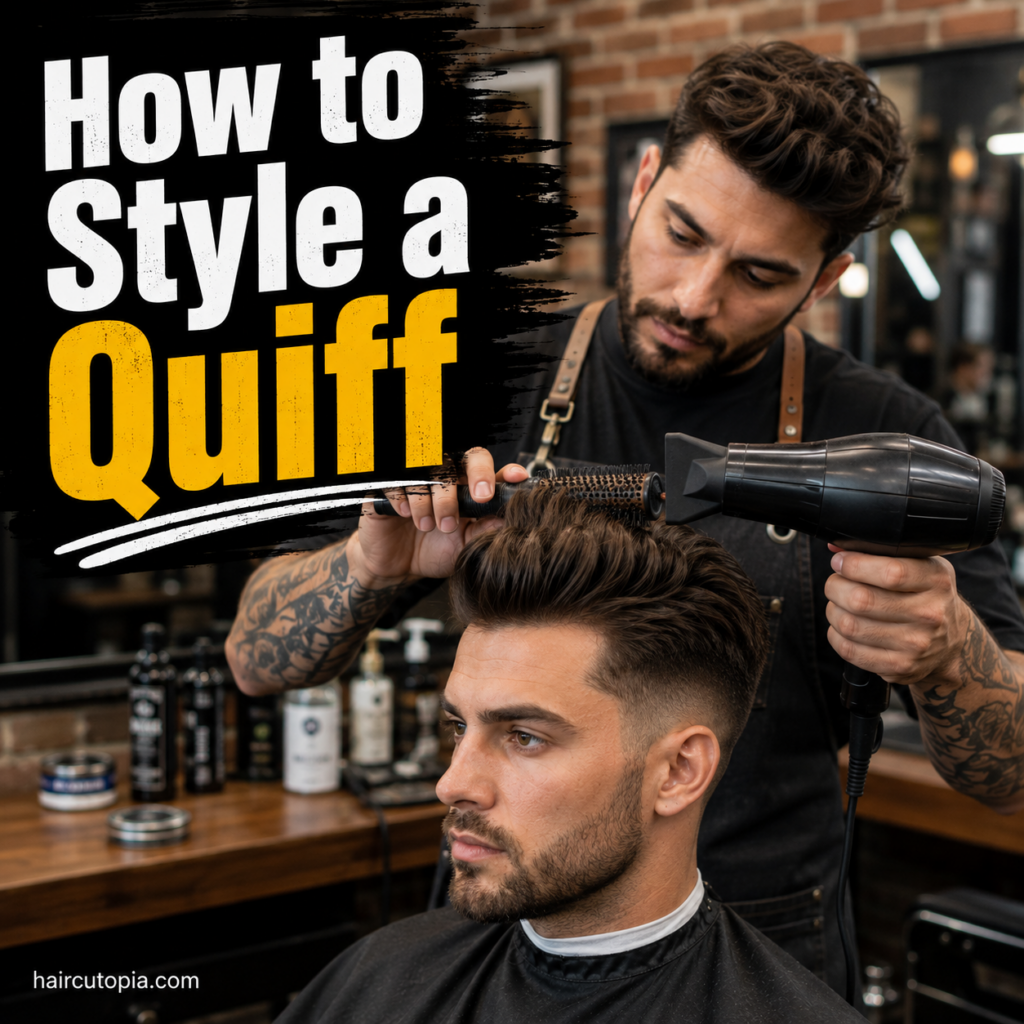
The quiff looks complicated when it’s done well, but the basic styling technique is surprisingly straightforward.
The biggest mistake is trying to create the entire hairstyle with wax, clay, or pomade. Styling product helps hold a quiff in place, but most of the shape and volume should be created before the finishing product ever touches your hair.
A blow dryer, the right direction, and a little patience at the front make a much bigger difference.
Whether you’re working with a short textured quiff or a longer, polished style, here’s how to get the shape right without turning your morning routine into a project.
What You Need to Style a Quiff
You don’t need an overflowing bathroom cabinet to style a quiff.
For most versions, a basic setup includes:
- Blow dryer
- Comb, vent brush, or round brush
- Styling product
- Towel
- Optional pre-styling product
- Optional hairspray
Your choice of styling product will depend on your hair type and the finish you want.
Matte clay or paste works well for textured styles, while pomade can create a smoother, more polished quiff.
The blow dryer is arguably more important than either.
How Long Does Your Hair Need to Be for a Quiff?
A short quiff can work with around 2 to 3 inches of hair at the front, while medium and larger quiffs usually benefit from more length.
Around 3 to 5 inches gives you considerably more freedom to create height and movement.
There’s no exact measurement that works for everyone.
Your ideal length depends on:
- Hair thickness
- Natural texture
- Growth direction
- Desired height
- Type of quiff
- How much time you want to spend styling
The front should generally be one of the longest areas because that’s where most of the recognizable quiff shape comes from.
If your hair is currently too short, you may simply need to let the front grow before you can achieve the look you want.
How to Style a Quiff Step by Step
Once you understand the basic process, you can adjust it for different quiff styles.
1. Start With Clean or Manageable Hair
You don’t necessarily need freshly shampooed hair every time you style a quiff.
In fact, some people find that their hair is easier to control the day after washing because it has a little more natural grip.
What matters is that the hair isn’t excessively oily or loaded with old styling product.
If there’s significant buildup, wash it before styling.
2. Leave Your Hair Slightly Damp
After showering, towel-dry your hair until it’s damp rather than dripping wet.
Starting with slightly damp hair gives you enough moisture to reset its direction while reducing the amount of time you’ll need to spend blow-drying.
Avoid aggressively rubbing your hair with the towel. Gently blotting or squeezing out the moisture is enough.
3. Apply a Pre-Styling Product
This step is optional, but it can make styling easier.
A lightweight pre-styler can provide additional volume, texture, or control before you begin blow-drying.
Depending on your hair, you might use:
- Volumizing mousse
- Sea salt spray
- Lightweight styling cream
- Volumizing spray
- Heat-protectant styling product
Fine hair generally benefits from lighter formulas. Heavy products can pull it down before you’ve even started creating the quiff.
4. Decide Which Direction the Quiff Will Go
A quiff usually moves upward and backward, but it doesn’t have to go perfectly straight back.
Many quiffs look more natural when they’re directed slightly to one side.
Pay attention to your natural growth pattern. Working somewhat with your hair rather than completely against it can make the finished style easier to maintain.
You can experiment with the direction until you find the shape that suits you.
5. Blow-Dry the Roots Upward
This is the most important part of the process.
Use your fingers, a comb, or a brush to lift the front while directing warm air toward the roots.
Lift first, then guide the hair backward.
If you immediately flatten everything toward the back of your head, you’ll lose much of the volume that makes a quiff a quiff.
Continue working across the top rather than focusing exclusively on the very front.
The goal is to build a foundation of volume.
6. Shape the Front of the Quiff
Once you’ve created root lift, begin forming the front.
Direct the hair upward and slightly backward while following the shape you want.
For a casual textured quiff, your fingers may be all you need.
For more height and control, a vent brush or round brush can help lift the front while the blow dryer sets it into position.
Don’t worry about making it perfect yet.
You’re establishing the silhouette. The finishing product will add definition afterward.
7. Finish Blow-Drying With Cooler Air
If your blow dryer has a cool setting, use it once you’ve created the shape.
Cooler air can help the hair settle into its new position.
At this point, you should already be able to see the basic quiff even without your finishing product.
If the hairstyle is completely flat before applying product, adding more clay or pomade usually isn’t the best solution. Go back and create more lift with the dryer.
8. Apply a Small Amount of Styling Product
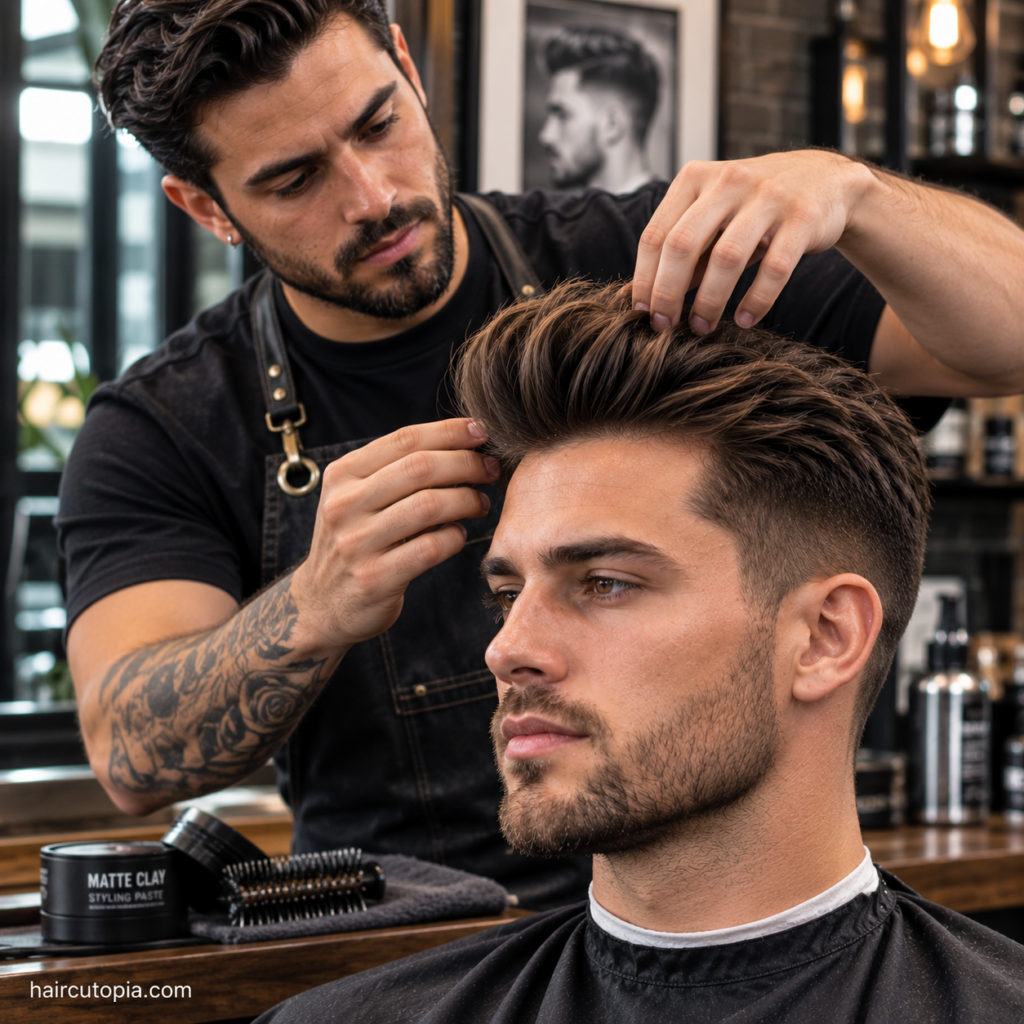
Start small.
Take a small amount of your chosen product and rub it thoroughly between your palms and fingers.
Work it through your hair rather than immediately coating the front.
Depending on the hairstyle, you can distribute some product from the back toward the front before concentrating on the areas that need more control.
This prevents one section from becoming overloaded.
9. Shape and Define the Quiff
Now refine the shape.
Use your fingers to pinch and separate sections if you want texture. For a smoother finish, use a comb.
Lift the front rather than pressing it down.
If you need additional hold, add another small amount of product instead of applying a large amount all at once.
10. Finish With Hairspray if Needed
Hairspray is optional.
A short or casual quiff may not need it at all.
For taller quiffs, special occasions, humid conditions, or long days, a light mist can provide additional hold.
Keep the application controlled. The goal is to preserve the shape without making the hair look frozen.
How to Blow-Dry a Quiff Properly
Blow-drying deserves extra attention because it’s where much of the hairstyle is created.
Think of the process in two stages.
First, create volume.
Second, create direction.
At the front, lift the hair away from the scalp while directing air toward the roots. Once you have height, begin guiding the hair backward into the shape you want.
Moving the dryer constantly also helps distribute the heat instead of concentrating it in one place.
You can use different tools depending on the result you’re after.
Styling With Your Fingers
Using your fingers creates a looser, more natural result.
This works particularly well for:
- Messy quiffs
- Textured quiffs
- Short quiffs
- Wavy hair
Use your fingers to lift and separate the hair as you dry it.
Styling With a Vent Brush
A vent brush allows air to move through the hair while giving you more control than your fingers.
It’s useful for creating height without producing an overly polished finish.
Styling With a Round Brush
A round brush can create more lift and a smoother curve at the front.
Lift the hair with the brush and direct the dryer toward it while gently rolling the hair backward.
This technique works particularly well for larger or more polished quiffs.
What Is the Best Product for Styling a Quiff?
There isn’t one universal quiff product.
The right choice depends on your hair and the finish you want.
Clay
Hair clay is a popular choice for modern quiffs because it can provide strong hold with relatively little shine.
It’s especially useful for:
- Textured quiffs
- Thick hair
- Matte finishes
- Stronger hold
Some clays can be heavy, so avoid using more than necessary.
Paste
Paste offers a good middle ground.
It usually provides enough control for everyday styling while leaving the hair more flexible than very strong clay or wax.
Paste is a good option if you like being able to reshape your quiff during the day.
Pomade
Pomade works well for smoother quiffs.
Choose it when you want:
- More shine
- Defined comb lines
- A classic finish
- Less emphasis on dry texture
Water-based and traditional pomades can behave differently, so experiment with the amount and application method.
Styling Cream
Styling cream is useful when you want a natural appearance with lighter control.
It can work especially well for longer, flowing quiffs that don’t need an extremely rigid shape.
Wax
Hair wax can provide control and separation while remaining workable.
It’s useful for medium-length styles, although heavier formulas can reduce volume if you use too much.
How to Style a Textured Quiff
A textured quiff should look defined without appearing perfectly sculpted.
After blow-drying:
- Apply a small amount of matte clay or paste.
- Work the product evenly through the top.
- Lift the front with your fingers.
- Pinch small sections to create separation.
- Loosen any areas that look too uniform.
Don’t try to make every strand point in the same direction.
A little irregularity is what gives a textured quiff its character.
How to Style a Short Quiff
A short quiff is one of the easiest versions to manage.
Start with damp hair and direct the front upward while blow-drying.
You may be able to do this entirely with your fingers.
Once dry, use a small amount of clay, paste, or wax to define the front.
Because there isn’t much length to support, avoid applying heavy amounts of product. A short quiff can collapse quickly when overloaded.
How to Style a Messy Quiff
A messy quiff isn’t simply an unstyled quiff.
You still need to create the underlying volume and direction.
Blow-dry the hair upward and backward, then apply a matte product.
Instead of combing everything into place, use your fingers to break up the shape.
Pull a few sections slightly forward or sideways while keeping the overall front elevated.
The result should look relaxed rather than accidental.
How to Style a Classic Quiff
A classic quiff tends to have a smoother and more controlled appearance.
Use a brush or comb during blow-drying to create a consistent shape.
Once the hair is dry, apply a paste or pomade and comb it into position.
Keep some volume at the front rather than slicking everything tightly against the scalp.
Classic quiffs also tend to work well with longer or more softly tapered sides.
How to Style a Quiff With a Fade
The styling technique on top doesn’t change dramatically just because you have a fade.
The difference is visual.
Short faded sides make the volume on top appear more dramatic, so you may not need an enormous quiff to create strong contrast.
Blow-dry the top for volume, apply your preferred styling product, and shape the front.
Because the sides are already tightly controlled, concentrate your effort on creating a clean silhouette through the top.
How to Style a Quiff With Straight Hair
Straight hair can create a very clean quiff, but it sometimes needs help maintaining volume.
Blow-drying is especially useful.
Apply a lightweight pre-styler if needed, then lift the roots while drying.
Fine, straight hair can collapse under heavy products, so start with a lightweight paste or clay.
If your hair is thick and straight, you may need stronger hold.
How to Style a Quiff With Wavy Hair
Natural waves can give a quiff plenty of character.
Instead of trying to straighten every section, consider working with the texture.
Use your fingers while blow-drying to create height while allowing some natural movement to remain.
A matte paste, cream, or clay can provide control without eliminating the waves.
This often produces a softer, more relaxed quiff.
How to Style a Quiff With Curly Hair
Curly hair can create a distinctive quiff with plenty of natural volume.
You don’t necessarily need to straighten the curls.
Focus on controlling the overall silhouette.
Direct the front upward and backward while maintaining the natural texture. A cream or appropriate styling product can help control frizz and provide definition.
The final result may look different from a straight-haired quiff, but that’s not a drawback. The curl pattern becomes part of the style.
How to Style a Quiff With Fine Hair
Fine hair benefits from volume without unnecessary weight.
Use lightweight products and concentrate on your blow-drying technique.
A volumizing pre-styler can help.
When applying your finishing product, use very little at first.
Heavy pomades and excessive wax can quickly flatten fine hair.
You may also find that a slightly shorter quiff holds its shape better than an extremely long one.
How to Style a Quiff With Thick Hair
Thick hair usually has plenty of natural structure, but controlling it can be the challenge.
Work the hair into shape while it’s damp and use the blow dryer to establish direction.
You may need a stronger clay, paste, or pomade to keep everything in place.
If your quiff constantly becomes bulky or refuses to cooperate despite proper styling, the haircut may need some weight removed.
Ask your barber whether the top needs additional shaping or texture.
Why Does My Quiff Keep Falling Down?
A quiff that repeatedly collapses can usually be traced to a few common problems.
You’re Using Too Much Product
More product means more weight.
If your hair looks great immediately after blow-drying and collapses when you apply product, you’re probably using too much or using a formula that’s too heavy.
You’re Skipping the Blow Dryer
Trying to create significant volume with styling product alone is difficult.
Create the height first. Hold it second.
You’re Blow-Drying Backward Instead of Upward
If you immediately push the hair backward, you can flatten the roots.
Lift the hair first, then guide it backward.
Your Hair Is Too Long or Heavy
Longer isn’t always better.
At some point, additional length can create enough weight to pull the quiff downward.
A barber can remove bulk while preserving much of the visible length.
Your Hair Isn’t Long Enough
The opposite problem can happen too.
If the front is extremely short, there simply may not be enough hair to create the height you’re trying to achieve.
How to Restyle a Quiff During the Day
One advantage of using a flexible product is that you can usually repair the hairstyle without starting over.
If your quiff loses some height:
- Lift the front with your fingers
- Push the roots upward
- Reshape the top
- Rework the existing product
- Add a tiny amount of product only if necessary
If the hair has become completely flattened, lightly dampening it and using a blow dryer again will usually give you better results.
Common Quiff Styling Mistakes
Getting the basic technique right is more important than owning a collection of styling products.
Try to avoid these common mistakes:
- Starting with soaking-wet hair
- Applying too much product
- Putting all the product directly on the front
- Skipping root lift
- Blow-drying everything flat toward the back
- Choosing products that are too heavy for your hair
- Using product to compensate for an overgrown haircut
- Expecting the hairstyle to look identical on every hair texture
A good quiff should work with your hair rather than requiring you to fight it every morning.
How Long Does It Take to Style a Quiff?
Once you’ve practiced the technique, an everyday quiff doesn’t need to take very long.
A short textured quiff may take only a few minutes.
A larger quiff requiring careful blow-drying, brushing, and finishing can take longer.
The process usually becomes faster once you know:
- Which direction your hair naturally wants to move
- How much product you actually need
- Which areas require the most blow-drying
- Which styling tool works best for your hair
Consistency matters more than speed when you’re first learning.
After a while, the routine becomes automatic.
A Simple Everyday Quiff Routine
If all the techniques sound like a lot to remember, reduce them to five basic steps:
- Start with slightly damp hair.
- Apply a lightweight pre-styler if needed.
- Blow-dry the front upward and backward.
- Apply a small amount of styling product.
- Shape the quiff with your fingers or a comb.
That’s the foundation.
From there, you can make the hairstyle smoother, messier, taller, more textured, or more natural depending on your preference.
Final Thoughts
Learning how to style a quiff is less about finding a miracle hair product and more about learning how to create shape before adding hold.
Start with manageable, slightly damp hair. Build volume at the roots with a blow dryer. Direct the front upward and backward, then use a small amount of product to define and hold the shape.
Once you’ve mastered that sequence, you can adapt it to almost any variation of the hairstyle.
And if styling suddenly becomes much harder than it used to be, don’t automatically blame your technique. Sometimes your quiff simply needs a trim to restore the shape that made it easy to style in the first place.